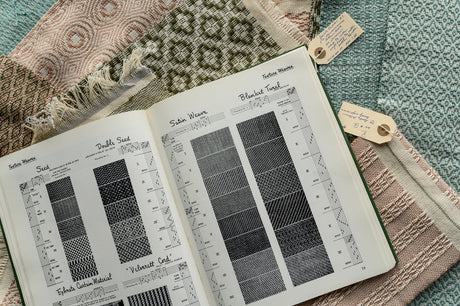
How I Became a Marguerite Porter Davison Fan
When we start weaving, we also start collecting: yarn, reeds, odds and ends, shuttles, bobbins, and of course books. My current weaving library is probably closing in on 100 books these...
When we start weaving, we also start collecting: yarn, reeds, odds and ends, shuttles, bobbins, and of course books. My current weaving library is probably closing in on 100 books these...

There are lots of reasons why we are excited to be featuring crackle weave this spring! Crackle is an incredibly versatile style of weaving from a design perspective, allowing you...

We wish. Last week, Brianna Tosswill and I sat down in our separate studios to have a chat about A Tactile Notion, and more broadly how our creative practices overlap.

Looms are a big part of what makes weaving so much fun. They are beautiful, often complex, always fascinating pieces of equipment. As you weave, you get to know your loom...

The holidays are upon us! Somehow, 2020 has managed to fly by despite also being the longest year ever. As I shop for gifts, I am making a special effort...

At the end of a beginner weaving workshop, I remember one student happily looking over her completed scarf saying “There were so many little steps to get here, but now...

Rigid heddle looms are a great entry point into the world of weaving. Brand new weavers can quickly whip off a pile of beautiful projects on an Ashford, Flip or...

Selvedges. If you’ve woven any length of time at all, you’ve heard people fret over them, brag about them, or trade all sorts of miracle cures for making them perfect....

Hi there! It's Kim here, and I have some exciting news to share! One of the things I have been missing during the pandemic is the ability to see and...

Being a maker around the holidays is a two-edged sword. On the one hand, it’s the perfect opportunity to share your weaving with family and friends. Nothing beats a handmade...

When you combine opposites, sometimes you get the best of both worlds. This scarf has a cottolin warp and an alpaca weft. Cottolin lends structure and sheen to the piece while...

There is so much to love about this scarf. Herringbone is an absolutely classic weave structure. Its clean, simple lines are perfect for showing off beautiful colours and textures in...
On a sunny Fall afternoon in Boyle-McCauley, new weavers showed off the fruit of their day’s labour. A mom and daughter had made matching placemats for their home, each in...
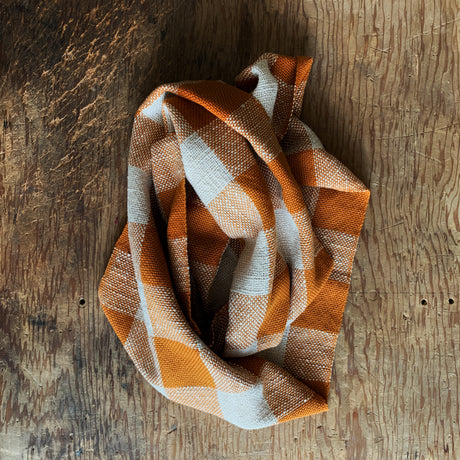
Introducing our latest rigid heddle pattern and kit: the Fall Checks Infinity Scarf! This scarf is perfect for days when the leaves are falling and the wind is starting to...

Dani has been doing lots of sewing 1:1 teaching lately. Here these two sewed the cutest little cardigan for a special photo shoot. Weaving and sewing are often seen as...

One of the coolest things about weaving is that it is generally understood to have emerged at similar times in many different geographical locations around the world. People weave in...

Hi there! I want to share with you a little bit about myself as a weaver, and I'm hoping you will share your story with me too. Weaving seems to draw...